Mint Your Ordinals Pixels on Luminex: A Step-by-Step Tutorial

We are thrilled to announce our partnership with Swapski, enabling users to self-inscribe the second phase of Ordinal Pixels! Luminex is the first-ever platform to provide a full-fledged Ordinals Launchpad and such an innovative minting experience in the ordinals space, and we can’t wait for the community to start using it.
Requirements Before Minting
Before you begin the minting process, it’s essential to ensure that you meet the necessary requirements. This section outlines the prerequisites for minting your Ordinal Pixels on Luminex.
1. XVerse Wallet
You will need a XVerse wallet to connect to the Luminex platform. If you don’t have one yet, you can easily download and set it up at XVerse.app. Make sure you securely store your seed phrase.
2. Sufficient Funds
To cover the inscription fee on Luminex, make sure you have enough BTC in your XVerse wallet. To be well-prepared and avoid any delays during the minting process, you can deposit BTC funds before the minting day. By doing so, you’ll be ready to mint your Ordinal Pixels as soon as the mint begins, without losing any time. The expected mint cost for a single pixels is at 170,000 sats (0.0017BTC).
Step-by-Step Tutorial
Follow these steps to mint your Ordinal Pixel on Luminex:
Step 1: Deposit BTC to your XVerse BTC Payment address
Open your XVerse wallet and deposit BTC to your BTC Payment address.
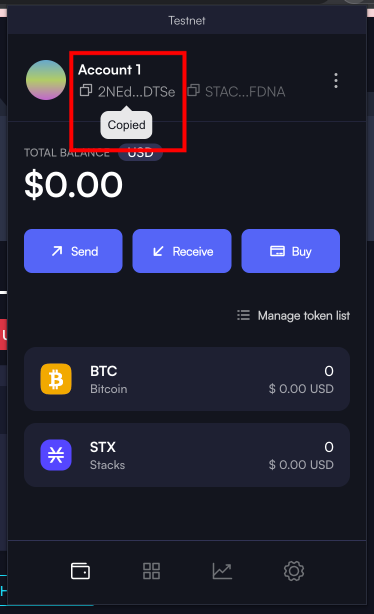
Step 2: Visit the Ordinal Pixel minting page
Go to the Ordinal Pixel minting page at https://www.luminex.io/mint/ordinalpixels
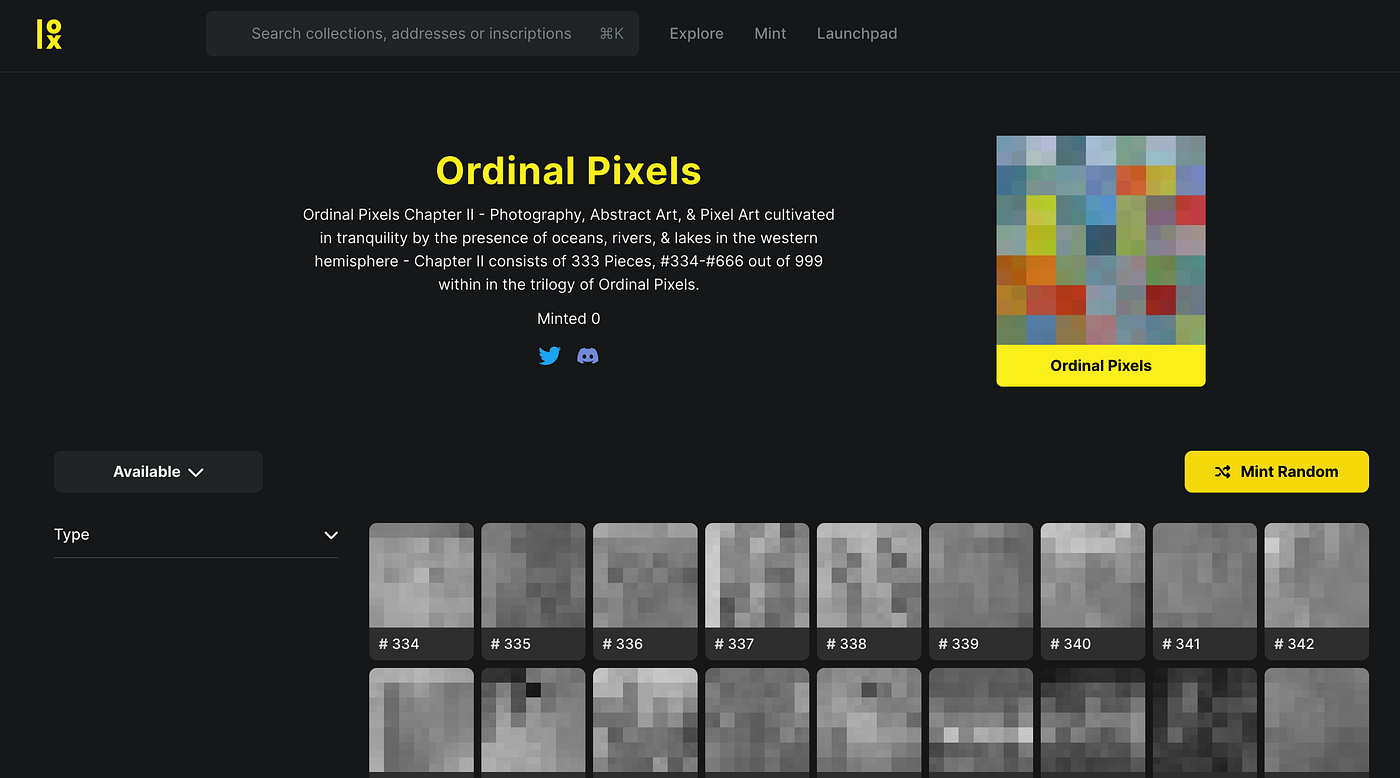
Step 3: Choose the Ordinal Pixel
Choose the Ordinal Pixel you would like to mint.
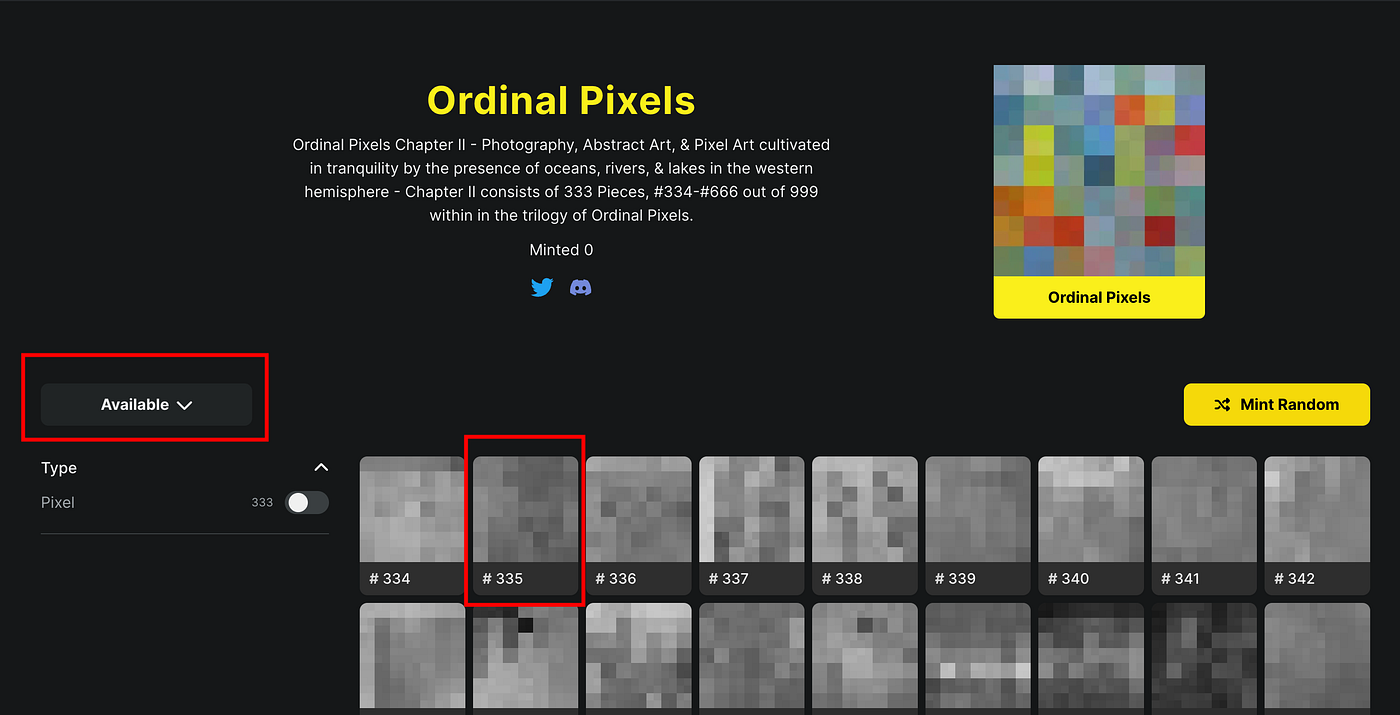
Step 4. Connect XVerse wallet
Click on your chosen Ordinal Pixel and connect with your XVerse wallet. If you’re in the whitelist, use the whitelisted XVerse address from Step 1.
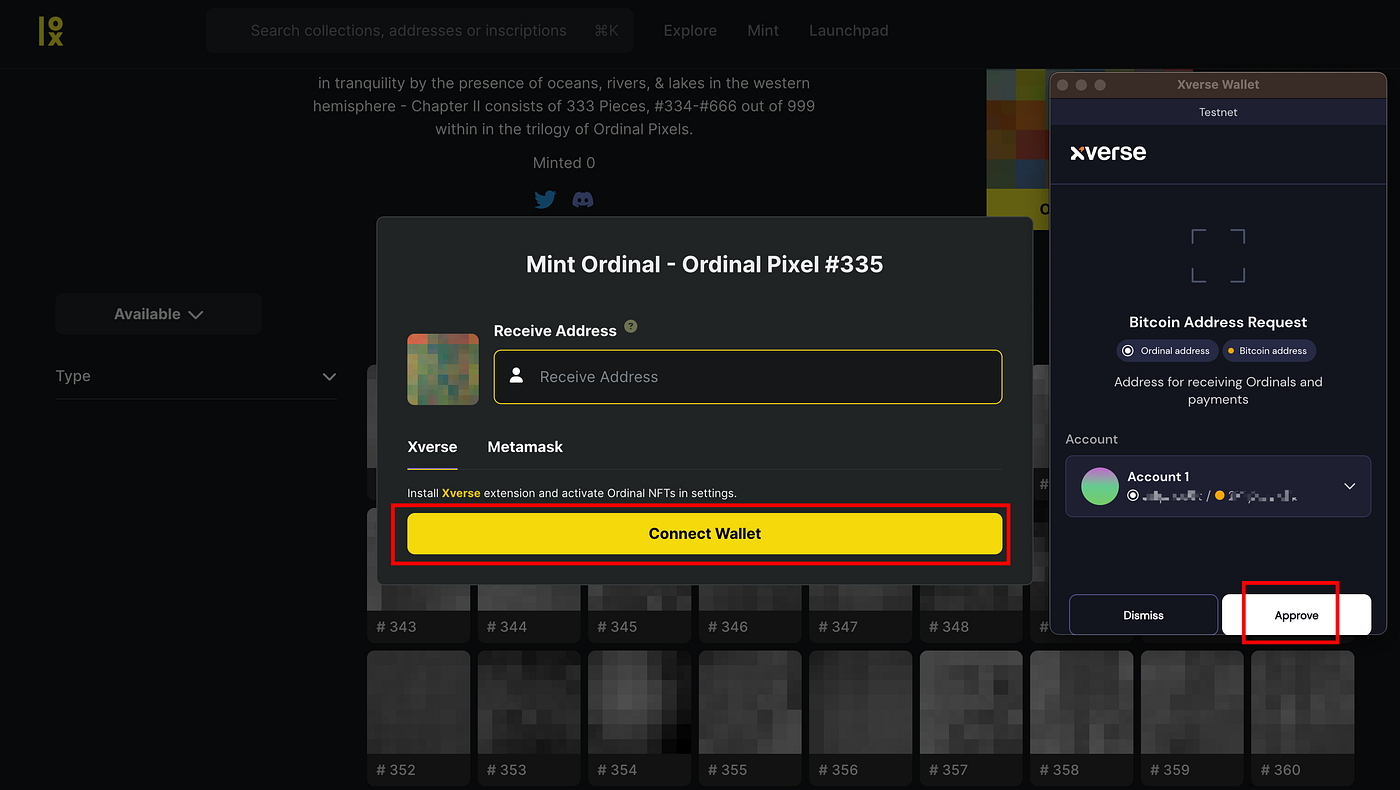
Step 5: Verify the Receive Address
Verify that the Receive address matches the XVerse Ordinals (Taproot) address
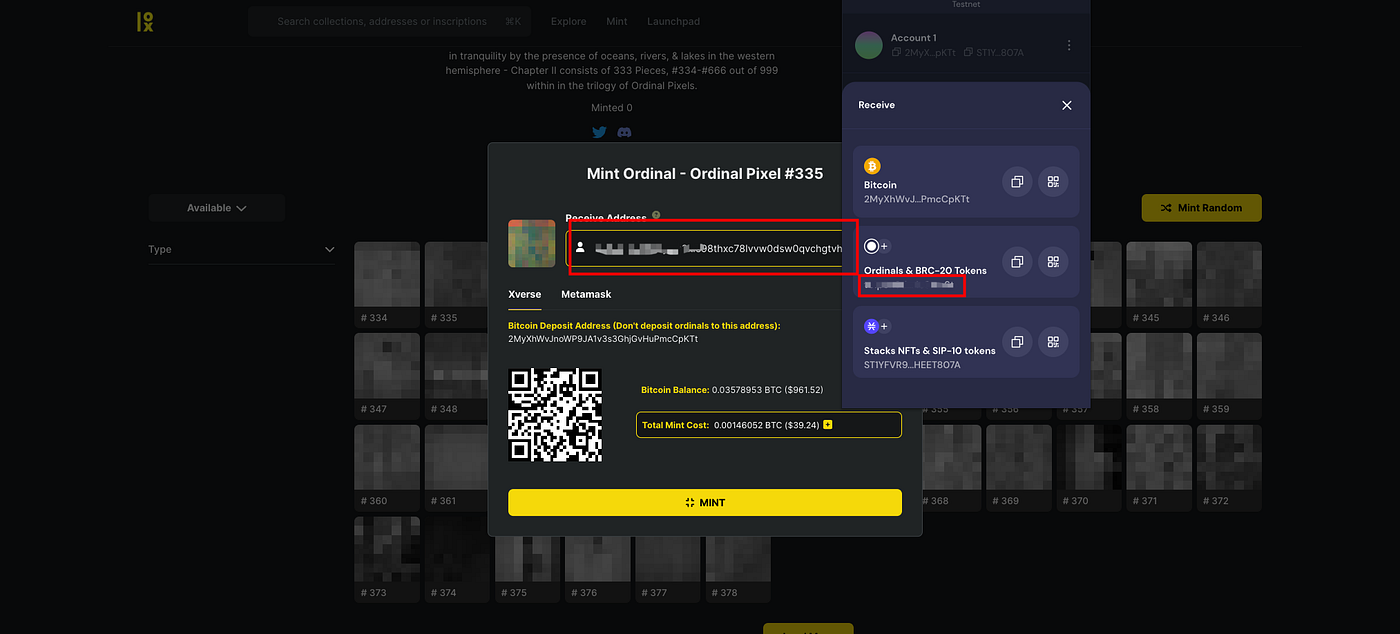
Step 6: Mint your Ordinal Pixel
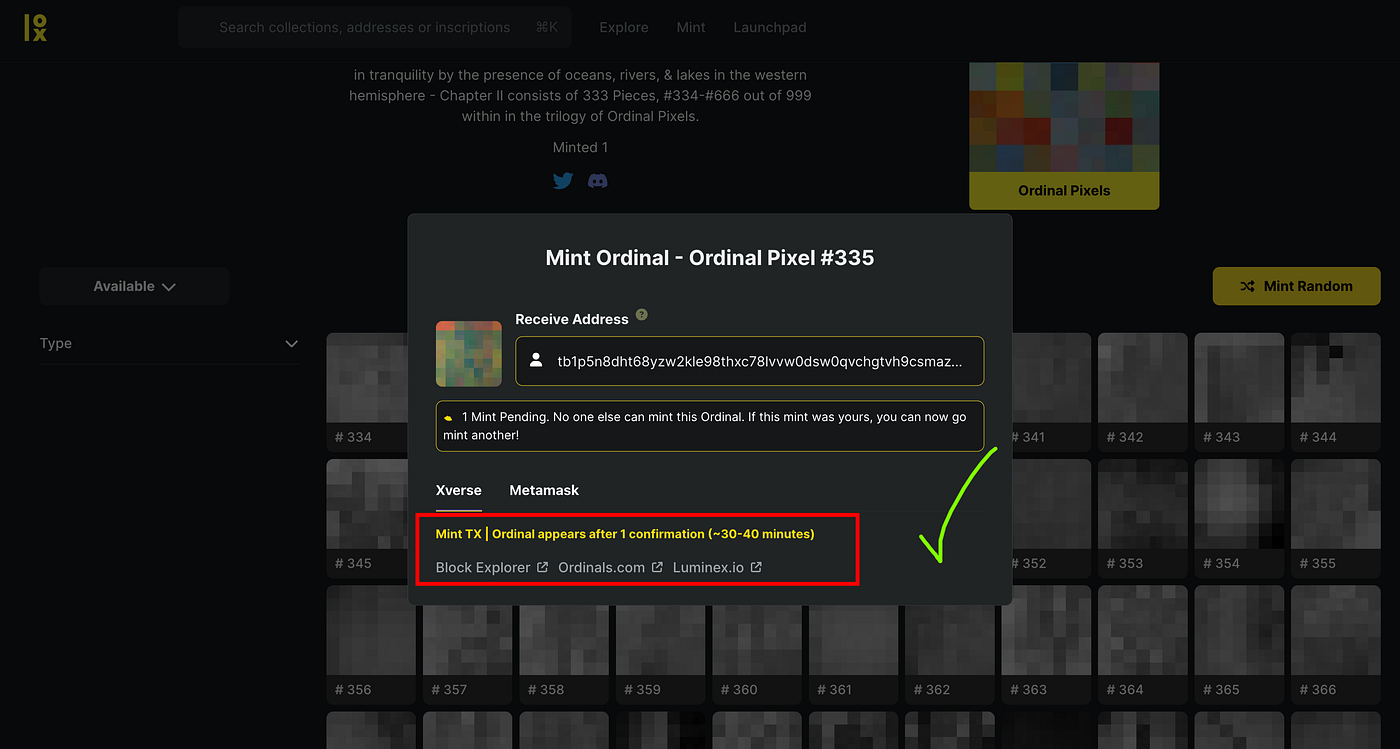
Click “Mint” and approve the XVerse transaction to initiate the process. You’ll see the commit and reveal transactions of the inscription. Once confirmed, the Ordinal Pixel will be sent to the Receive Address from Step 5.
Congratulations! You’ve successfully minted an Ordinal Pixel on Luminex. Welcome to the Ordinal Pixels community!
Conclusion
By following the step-by-step tutorial and ensuring you meet all requirements before minting, you’ll become a proud owner of unique Ordinal Pixels and join an ever-growing community.
Luminex’s partnership with Swapski showcases the platform’s potential and commitment to offering a seamless and user-friendly experience. As the world of ordinals and NFTs continues to expand, we are excited to see the creative ways in which the Ordinal Pixel community will embrace and utilize their minted assets.
We hope you found this tutorial helpful. If you have any questions or need support during the minting process, feel free to reach out to us on Luminex Discord server. Our team and community members are more than happy to assist you and ensure a smooth minting experience.
Happy minting, and welcome to the Luminex and Ordinal Pixels community!
Luminex Discord: Join Luminex Discord Server
54

